osprey ayres backpack

The new season is here and with up to 60% off at OSPREY LONDON, you can afford to indulge your love of beautiful leather bags, accessories, scarves, gifts and more. OSPREY LONDON is renowned for its vintage-inspired bags and accessories, created by British designer Graeme Ellisdon and crafted from the most sumptuous leathers using traditional saddlery techniques. Alongside timeless leather workbags, accessories and belts for both men and women, you'll find great wardrobe updates from this season's most-wanted slouchy leather shoulder bags and chic leather grab bags, to co-ordinating purses and silk scarves in the prettiest of colours, plus boxed leather gifts and some very special limited edition pieces.They can save your energy when you go uphill, your joints on the downhill and help you keep your balance in tough terrain. But if you don’t use them right, you’ll just be weighing yourself down with useless gear. This article walks you through exactly how to use walking poles on the trail.

Before we get into how to use your walking poles, you might be wondering why you should use them at all. Are they just extra gear to carry? Turns out there are many ways walking poles (aka trekking or hiking poles) help you hike safer, faster and farther. If you don’t have a set yet, check out the best hiking poles of 2016 for some good options and tips on how to go about buying your first pair. Trekking poles help you go faster on flat ground and going uphill. They let you use your arms to push forward, giving your legs a bit of a break. You’ll be able to hike farther since your legs are doing less work. Also, you’ll find you can go faster over the same distance. This is one of our 41 backpacking tips for beginners. Going down steep hills, especially with tired legs or a heavy backpack puts a lot of stress on your knees and ankles. Over a long hike, that’s a lot of pounding on your joints. Leaning on walking poles going downhill reduces some of that wear and tear.

Walking poles are like an extendable arm helping you balance in complicated terrain. If the trail is very rocky or muddy you can use the poles as two more points of contact with the ground. This will help you stay upright and not face down in the mud. If one foot slips, there are still three points to keep you standing. Walking poles have many other uses you’ll see on the trail. They can clear stinging nettles or poison ivy off the trail, be a monopod for your camera, make you look larger for scaring away animals or hold up a tarp for overnight shelters. Richard Ayres, International Mountain Leader and physiology teacher writing for the BMC, adds that poles “also help in keeping your body posture more upright, which aids breathing – a useful aid to acclimatization at altitude.” One of the most common mistakes with walking poles is setting them at the right height. Here’s how to adjust them to be the most comfortable for you. “Firstly adjust the poles to the correct length – so that the pole handle touches the floor when you grip the pole above the basket with your elbow bent at 90 degrees,” Ayres says on the BMC.
I find setting the top section at about 2/3 it’s height works well. Then set the bottom section to the right height to bring your elbow to 90 degrees. If you’re in the snow, remember that the end of the pole will sink in to the basket so you’ll need to make it a few inches longer. Check that the locks are tight once you’re done setting the height. Plant the pole and lean on it a bit. The last thing you want on the trail is for the pole to collapse when you need it most. Photo by Graham Clenaghan, licensed under CC BY The second common mistake new walking pole users make is they hold the strap the wrong way. Here’s how to use it most effectively. When you put the straps around your hands, reach up from the bottom, through the straps, and then grab the handle. The strap will wrap around your hand and let your lean on it so your hand doesn’t slide down the handle if it gets slippery or tired. Jeff from SoCal Hiker shows how to put your hand through the strap properly in this quick video.

Some walking pole straps are adjustable. Tighten yours as far as they’ll go and still be able to grip the handle comfortably like the video above. Loosen it slightly until you’re able to hold the handle with no problems. Why use the straps like this? Skip Spitzer has a great answer in an article for Backpacking Light magazine, “You are making a joint by using the strap as a strong, tireless ligament. If you grip tightly, your hands and wrists will needlessly work and stress.” Of course it’s up to you if you want to use them like this. Some people don’t like the feeling of being attached to the poles and never use the straps. Most walking poles come with round discs that fit onto the bottom like on a ski pole. These stop the pole from sliding into deep mud or snow. Some have ski baskets as well that are just bigger than the mud baskets. If the baskets aren’t already on your poles, slide them onto the end and screw or click them into place. They shouldn’t move at all once they’re set.

Now you’ve got your straps and height adjusted and mud baskets on, it’s time to hike! Here’s how to use walking poles most efficiently. Standing on flat ground, you’ll have your arms at 90 degrees. Every step you take you’ll swing your arms just like you naturally do walking. Step with your left foot forward and swing your right arm forward. If you want, just start by holding the poles in your arms and watch how your arms swing when you walk. Swing the pole forward, plant the tip in the ground and push off the ground when you step past it. The main idea is to push yourself forward with the poles, one side at a time. If you come to a large log or rock to step over you can try planting both trekking poles up where you are going and pulling yourself up. Sometimes having one up to pull and one down to push works well. When you pick up the pole to swing it forward for the next step, try to keep it as low as possible, just above the ground. The higher you lift the pole, the more energy you are using.

If the trail is clear, you only need to lift the pole a couple inches and let it swing forward. Keep a loose grip on the handle. Using the strap properly will help with this. Try holding the pole with only your thumb and index finger to practice a light grip. Holding the handle too tight won’t break anything, it’ll just use extra energy. As you’re walking, make sure the tip of the pole doesn’t get caught in between two rocks or boards in a boardwalk. If the tip is caught and you pull forward, it could bend or break. If this happens, let the pole go back to the same angle it got caught and pull straight out. Shorten your poles when going uphill. Since the ground in front of you is higher than where your feet are, you don’t need the poles to be as long. Your arms will get tired reaching too high. If the uphill section is short, you could just ignore it. Adjusting the height of your poles might take a couple minutes and you’ll just be back on a flat section again anyways.

An alternative to unlocking and re-locking the poles at a shorter length is to take your hands out of the straps and grip it below the handle. You don’t have to stop to change the lengths and you get a shorter pole. Some walking poles like the Black Diamond Trail Pro Shock will have soft grip material below the handle for this reason. Just the opposite of going uphill, adjust your poles to be longer when going downhill. You can also hold the poles on the top of the handles for negotiating steeper sections. Test the placement of your pole is secure before putting your weight on it. Sidehilling, or contouring, is when you hike across a hill. One side will be higher than the other. Adjust the uphill pole to be shorter than the downhill pole. For lesser angles, just grab the pole below the handle. If you are switchbacking up a hill back and forth, just switch hands with the poles as you turn back and forth to save time. Walking poles are useful as an extension to your arm.

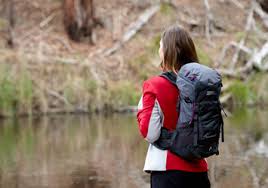
You can test rocks to see if they move before stepping or mud pits to see how deep they are. I’ve had rude surprises stepping into what I thought was a couple inches of mud when it was actually more than a foot deep. Mud or snow baskets will prevent the pole from sinking too deep. Sometimes you need your hands free when you’re hiking. Climbing ladders, checking maps or taking photos are tough to do with walking poles in your hands. If you’re just taking a quick photo and the ground is soft enough, just stick the poles in the ground. Just don’t forget them when you leave. Most backpacks have some sort of straps on the outside for attaching gear. Strap your poles to the side or back of your pack. This is a nice option if you won’t need them for a while. If you don’t have a kind friend to attach the poles to your pack, you might have to take it off first. Osprey backpacks like the Ariel 65 have their Stow-on-the-Go feature. Put the tips in the loop on the side of the pack and then tighten the bungee on the shoulder strap around the handles and you have your hands free.